I find that I generally enjoy building model kits by Bandai, particularly Gundams. I've done a few with my biggest project being a master grade a friend and I made together. It was fun, but after we completed it, we found that despite the amazing level of detail and color that went into making it, it still lacked the overall "oomph" that painted Gundams had. So after thinking about it, we started reading Gundam tips that experts posted on the web, we also consulted a Gundam hobbyist at work and the general consensus was that if you paint Gundams they look better.
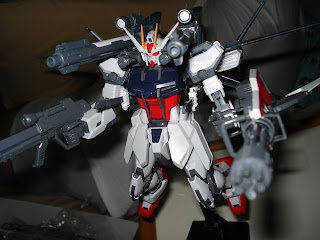
 Strike Gundam with IWSP in all its unpainted glory (still beautiful though!)
So I decided to go out and buy a simple Gundam kit and buy a couple of cans of paint, this way my buddy and I can try out painting Gundam's without the guilt of ruining a very expensive kit. Gundam's have an inner lining of gold within their plastic parts, it is this sandwiching of a precious metal in between the plastic that constitutes the relatively high price of Gundam kits (in my opinion).
 The willing participant, a simple SD Gundam (Strike Noir) There was far less gold inlaid with this kit so he was cheaper (still expensive though)
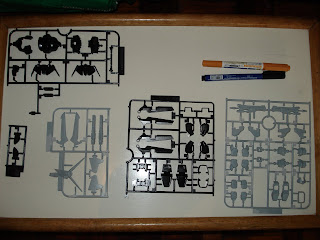
With paint and Gundam subject in hand I readied the necessary materials, the paints, the markers and an eraser for erasing erroneous panel lines. I then began to remove the sprue's from the small box and I started applying paper tape to the alpha numeric labeling (just in case I over paint and cover up the labels of the sprue) after which I began laying them about on a matting of old newspapers to prepare them for a generous coating of paint.

A sprue before painting
 A sprue applied with paper tape on the labeling
 Ready for a bout of vandalism... I mean sprue painting.
I then take the paint can in hand, shake them a bit to get the proper mixture of air and paint (hopefully the paint doesn't spit... I hear they sometimes do) and start spraying about 2 feet from the target sprue. I did this on instinct because I once did a similar project with foam and cardboard lettering, in my gusto to try out spray painting, I applied too thick a layer that the cardboard letters were covered completely lolx. So after spraying a fine layer on the plastic I immediately notice a change in texture aside from the obvious change in color. I leave them for a while and when I came back I found that they have changed from cheap "plasticky" looking to well defined and textured. I immediately find the results of painting generally beneficial to overall Gundam building.
 Let the spraying begin!
 I thought this was a mess, but it really only looks bad in pictures, they actually look better up close and personal.
After the painting session, I examine up close the results, and I can see that there has been a lot of improvement with the texture and the apparent quality of the plastic. The paint added a certain depth to the plastic and now looks like it was made with higher quality.
 A part before painting...
 Same part after paint apps... (looks better in person)
 Look at the difference between the unpainted plastic surface and the painted ones.
 Another effect of spray painting the Gundam parts seems to be better detailing of the various nooks and crannies of detail etchings. Normally one would have to go over said parts with a Gundam marker to etch out the panel lines, but sometimes after paint application, the part barely needs anymore attention because the detail already came out.
 A part after its been treated with paint. Notice the detail stands out already... The really skilled can go further and apply panel etchings to this... I unfortunately am not such a person.
All that's left now is to let them dry and panel lines, and finally construction.
Will post an update to the completed figure as soon as it is uhmm... completed. 0_o


3 comments:
Awsome look dude. How did the SD turn out in the end?
Hi there, it came out looking really great, I have an update for this post, but linked it to my buddy's blog (we usually share kit building jobs to save time and money...hehe)
Here is the link:
http://eckoysnook.blogspot.com/2007/08/strike-noir-sd-bigger-than-you-want-it.html
Although, we were still pretty much beginners at that point (though were no experts either) you will find our further posts on Gundam building to be a lot more better in terms of paint apps and panel lining.
Peace o_Ox
oops, the link appears to be broken, but double clicking it and copying will select the entire link.
Just in case, check out
http://eckoysnook.blogspot.com/
under the August 1, 2007 entry for the SD update.
Thanks!
Post a Comment